

Start here
The quick answer
Most single-handle faucet leaks are fixed by shutting off the water, removing the handle, taking out the retaining nut or clip, replacing the cartridge or worn O-rings, and then testing the faucet slowly. If the shutoff valves are stuck, the cartridge is seized, or water is leaking inside the cabinet, stop and get help before the repair turns into water damage.
Before you start
Tools and parts to have nearby
These repairs are much calmer when everything is within reach. You may not need every item, but having them nearby is what keeps a quick job from turning into a half-finished one with parts spread across the floor.
- Replacement cartridge or O-ring kit that matches your faucet
- Allen key or small screwdriver
- Adjustable wrench or channel-lock pliers
- Needle-nose pliers
- Clean towel and small bucket
- Plumber's grease made for faucet parts
- Phone camera for reference photos before removing parts

A little diagnosis first
What to check before you begin
Find where the leak is coming from
A drip from the spout when the faucet is off usually points to the cartridge. Water around the base of the faucet often means an O-ring or seal is worn. Water inside the vanity or cabinet can be a supply-line issue, which deserves more caution.
Buy the right part before you open everything
Single-handle faucets do not all use the same cartridge. If you know the brand and model, bring that information to the hardware store. If not, take clear photos of the faucet and, if needed, bring the old cartridge with you once it is removed.
Do not force old plumbing
Old shutoff valves, corroded retaining nuts, and stuck cartridges can break if you muscle through them. A slow repair is fine. A snapped valve under the sink is not the kind of adventure anyone needs on a Tuesday night.
Step-by-step
How to Fix a Leaky Single-Handle Faucet
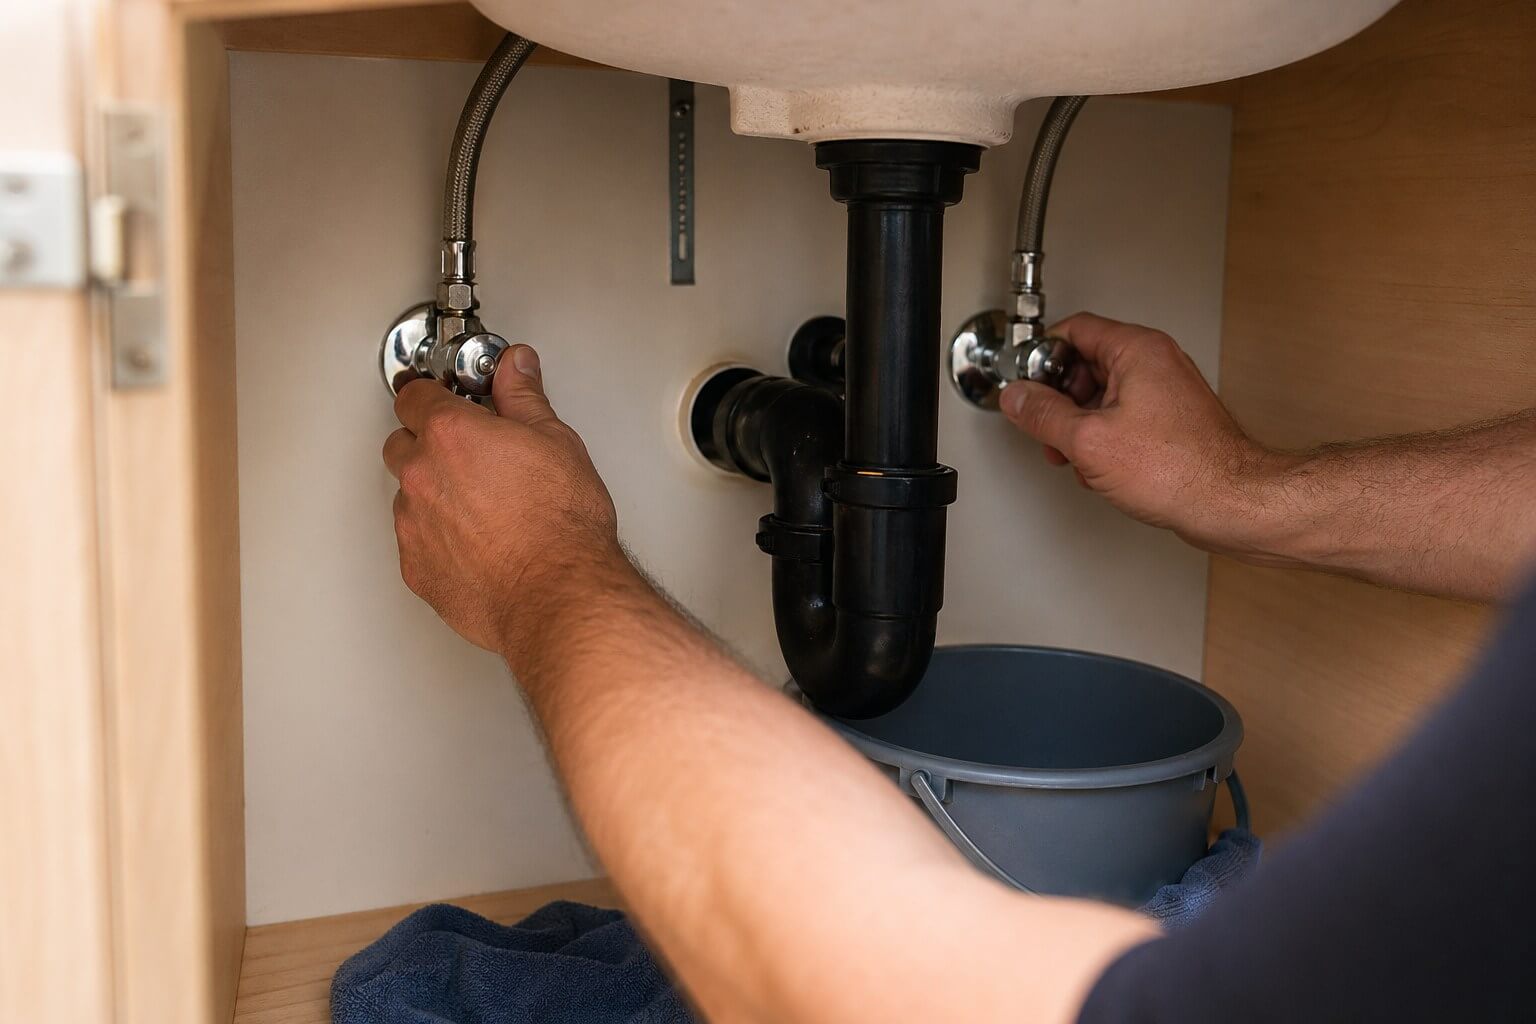
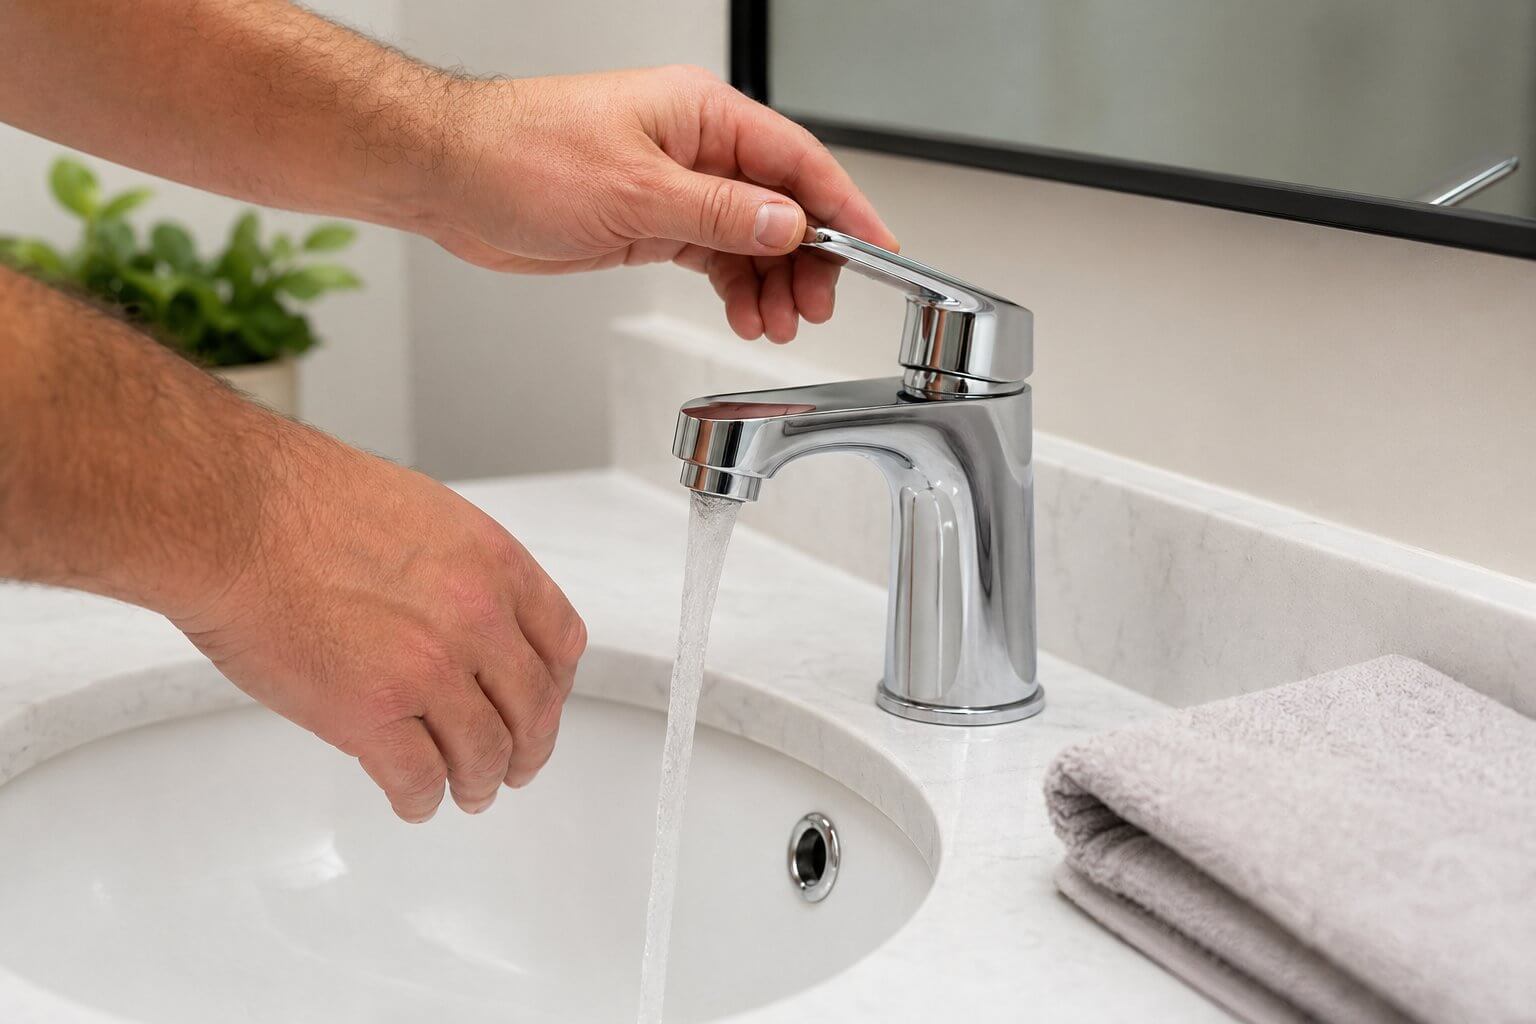
1. Turn off the water under the sink
Open the cabinet and turn both shutoff valves clockwise until they stop. One valve controls hot water, the other controls cold. Put a towel and small bucket underneath just in case a little water comes out when you disconnect or loosen anything.
After the valves are closed, turn the faucet on for a few seconds. This releases pressure and confirms the water is actually off. If water keeps flowing, the shutoff valves may not be working properly, and that is a good moment to pause.
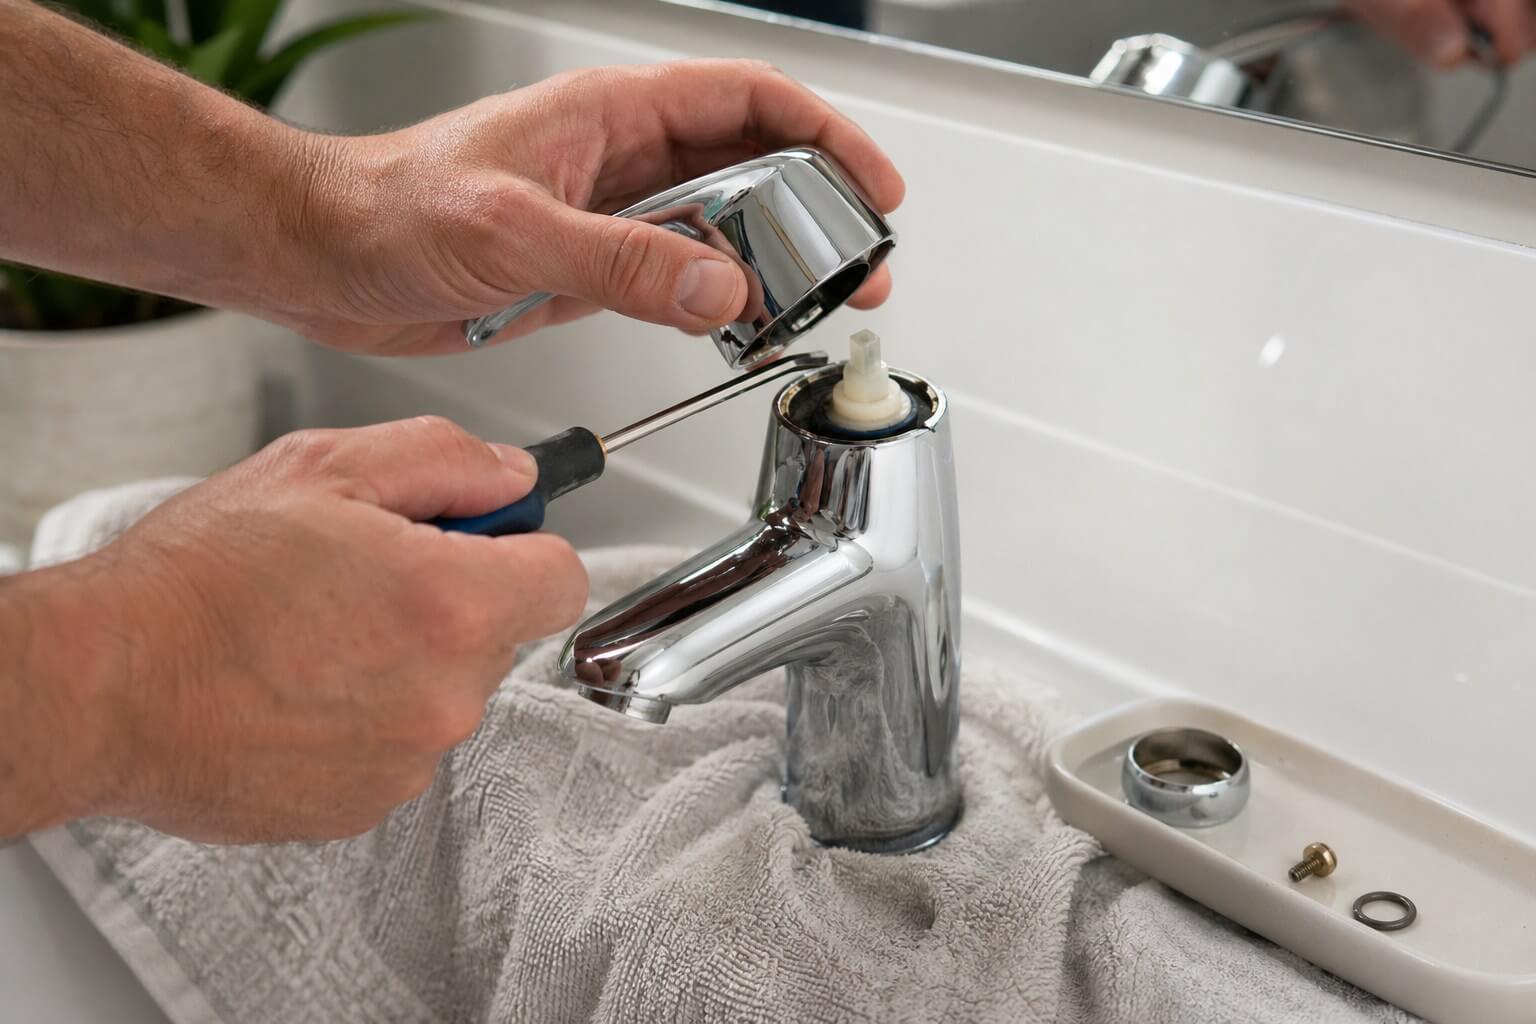
2. Cover the drain and remove the faucet handle
Cover the drain with a towel or stopper so tiny screws cannot disappear. Most single-handle faucets have a set screw hidden under a small cap, behind the handle, or near the base. Use the right Allen key or screwdriver and loosen it gently.
Lift the handle off and place every small part in order on a towel. If you are not sure how it goes back together, take a photo before each piece comes off. Future-you will appreciate it.
3. Remove the retaining nut, clip, or collar
Under the handle you may see a retaining nut, a metal clip, or a decorative collar holding the cartridge in place. Remove it carefully. If there is mineral buildup, work slowly instead of twisting harder and harder.
Keep the parts lined up in the order you remove them. Many faucet repairs go sideways not because the fix is hard, but because one washer or collar gets flipped around during reassembly.
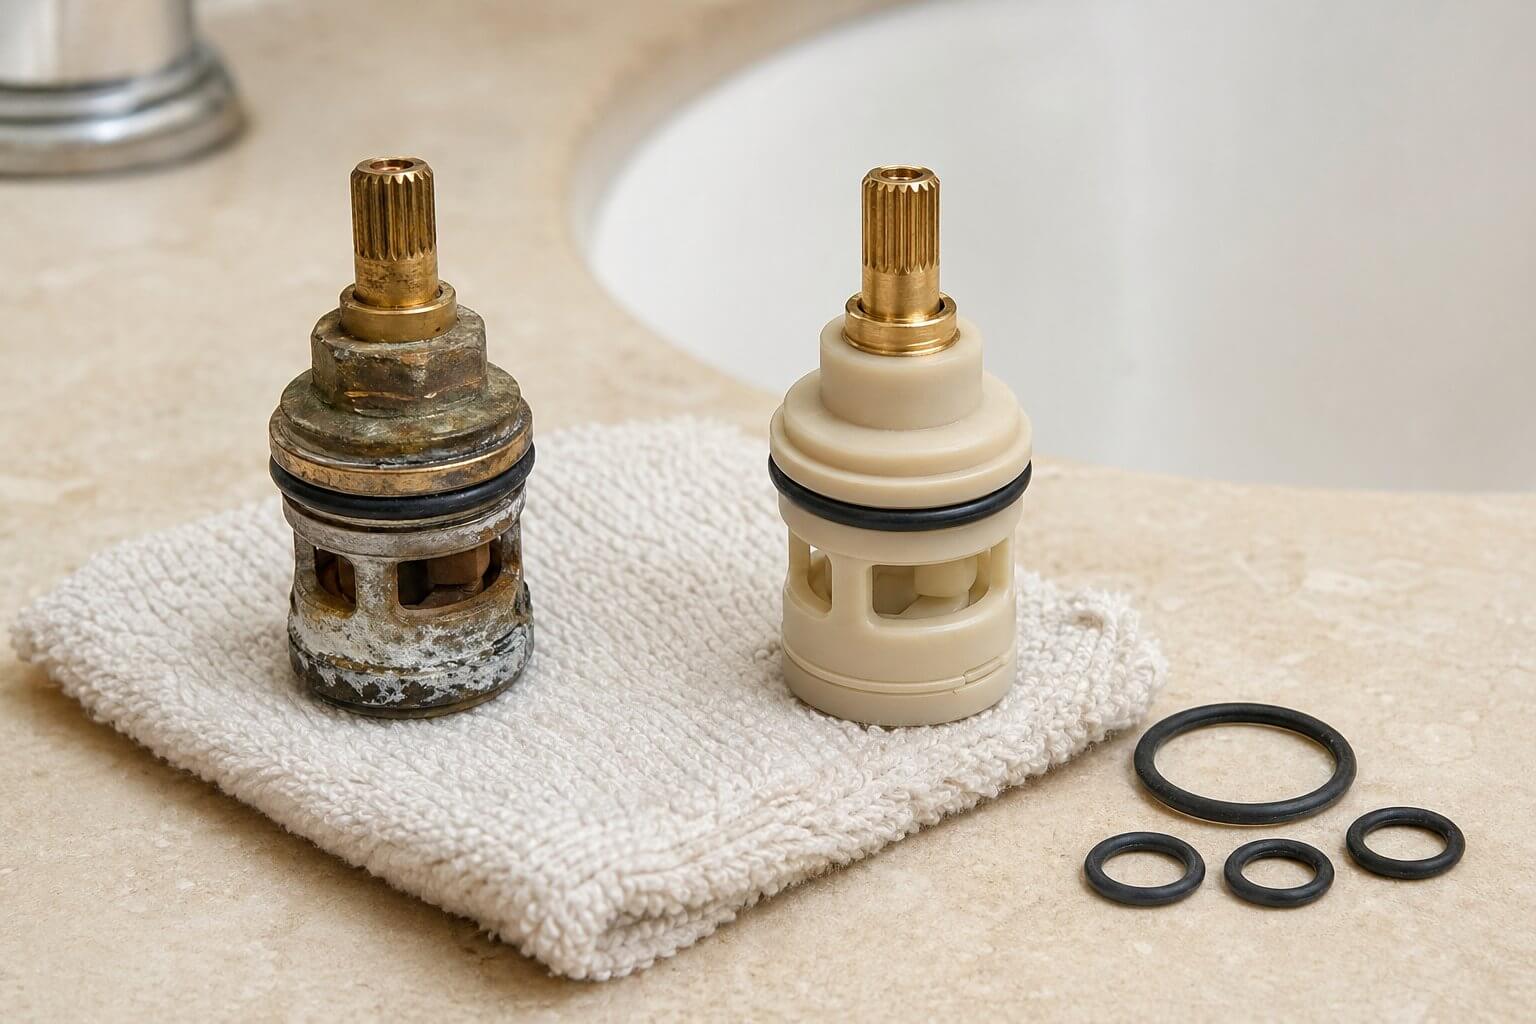
4. Pull out the old cartridge or seals
Pull the cartridge straight up or out, depending on the faucet style. Some come out by hand, while others need needle-nose pliers or a cartridge puller. Try to keep the angle straight so you do not damage the faucet body.
Look at the cartridge and O-rings. Cracks, flattened rubber, mineral buildup, and rough movement are all common reasons a faucet keeps dripping even when the handle is turned off.
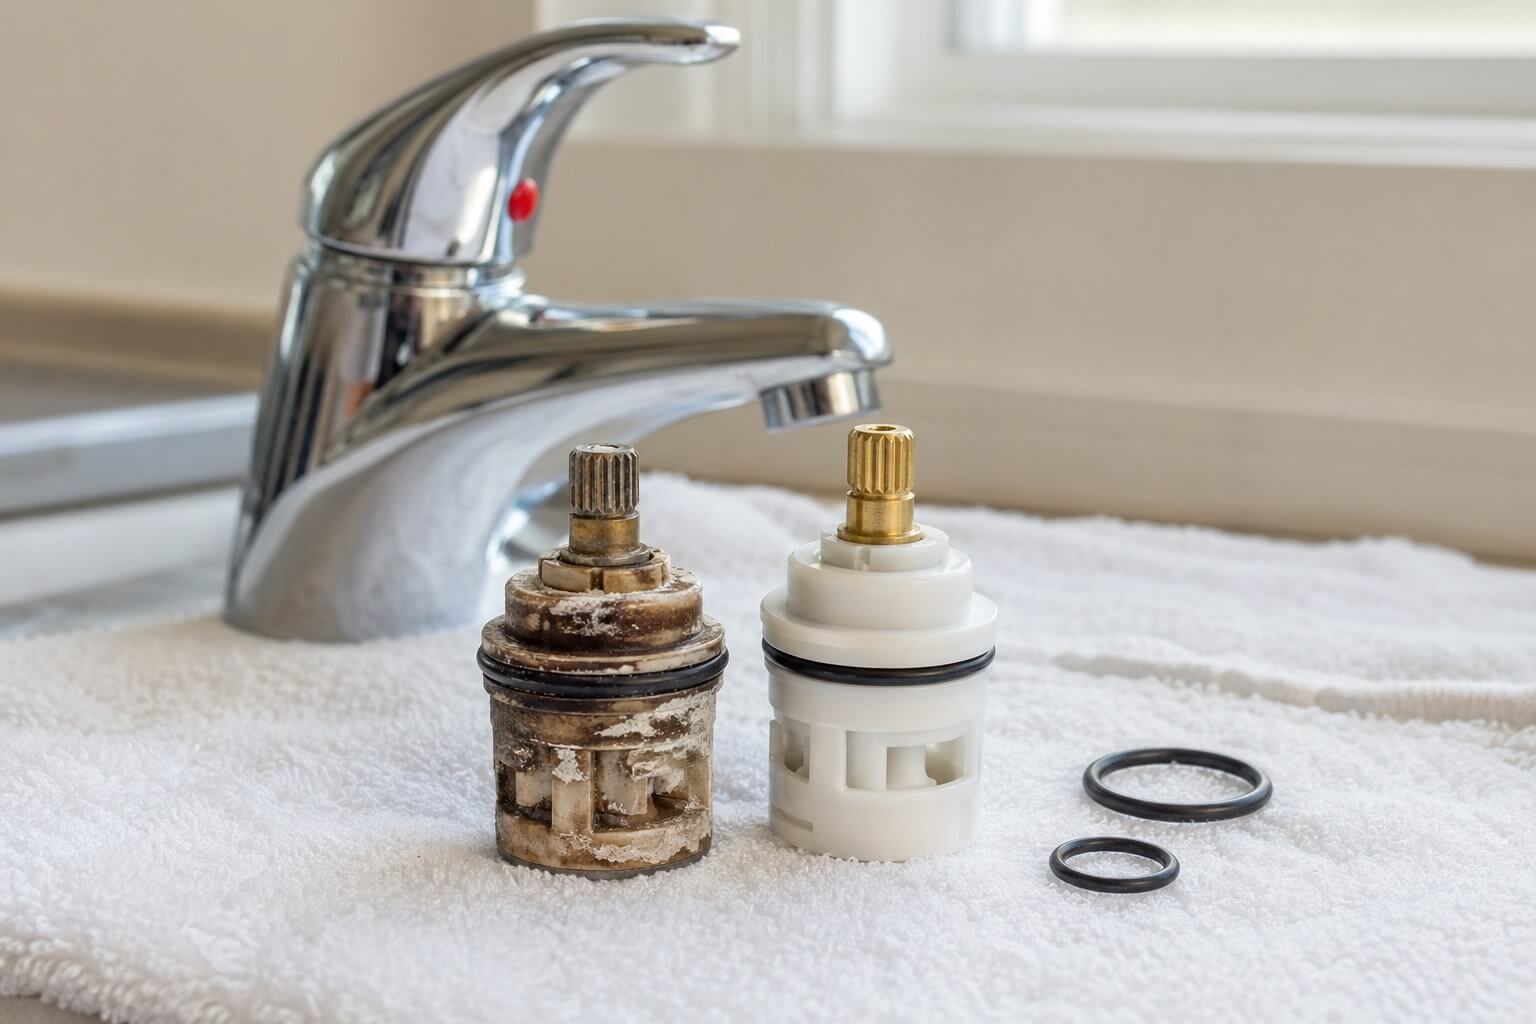
5. Match the replacement part
Compare the old cartridge with the new one before installing it. The length, tabs, holes, and rubber seals should match closely. If something looks different, do not force it into the faucet.
If you are replacing only O-rings, remove the old ones carefully and install the new ones in the same grooves. A small amount of plumber's grease helps them seat smoothly, but do not overdo it.
6. Reassemble the faucet and test slowly
Put the cartridge, retaining part, collar, and handle back in the same order. Tighten things snugly, not aggressively. Faucet parts need to seal, but over-tightening can crack plastic parts or make the handle feel stiff.
Turn the water valves back on slowly and watch the faucet, the base, and the cabinet underneath. Run hot and cold water, move the handle through its full range, then shut it off and wait a minute. No drip means you probably got it.
If something still feels off
Troubleshooting common problems
The faucet still drips from the spout
The cartridge may be the wrong model, not fully seated, or installed in the wrong orientation. Shut the water off and check the fit before buying more parts.
Water leaks around the handle or base
Check the O-rings and seals. A small cut, old flattened rubber, or missing seal can let water escape even when the cartridge is new.
The handle feels tight or rough
The retaining nut may be too tight, or the cartridge may not be aligned properly. Loosen, realign, and test again before forcing the handle.
The shutoff valve will not close
Do not keep forcing it. A stuck shutoff valve can break and cause a bigger leak. This is a smart time to call a plumber or handyman.
Know when to stop
When it is better to call for help
There is no prize for turning a small repair into a much larger one. If one of these situations shows up, bringing in help is the practical move:
- The shutoff valves are frozen, leaking, or missing.
- The cartridge is stuck and will not come out without heavy force.
- Water is leaking into the vanity, wall, floor, or cabinet.
- You live in a condo or rental where plumbing work has rules or approval requirements.
- You are not sure which part to buy and do not want to open the faucet twice.
FixitTask
Need a hand with the repair?
If the repair starts feeling less like a quick fix and more like a project, FixitTask can help you compare local handyman providers, ask questions before booking, and choose someone who fits the job.
FAQ
Questions people usually ask
What usually causes a single-handle faucet to leak?
The most common cause is a worn cartridge or damaged rubber seal. Over time, mineral buildup and daily use can stop the internal parts from sealing tightly, so water sneaks through even when the handle is off.
Can I fix a leaky single-handle faucet without replacing the whole faucet?
Usually, yes. If the faucet body is in good shape, replacing the cartridge or O-rings is often enough. Replacing the entire faucet is usually only needed when parts are unavailable, the body is corroded, or the faucet has other damage.
How do I know which faucet cartridge to buy?
Start with the faucet brand and model if you have it. If not, remove the old cartridge after shutting off the water and bring it to the hardware store. Matching the shape, length, tabs, and seals matters.
Should I call someone if the shutoff valve is stuck?
Yes. A stuck or leaking shutoff valve is not worth forcing. If it breaks, you may need to shut off water to the whole home and deal with a much larger leak.