
Start here
The quick answer
Lift the tank lid and flush once, then watch. If water runs into the bowl after the tank fills, the flapper is probably leaking. If water keeps trickling into the tank and the fill valve runs constantly, the float height may be set too high or the fill valve is worn. If water is spilling into the overflow tube, the float needs adjusting. Most of these fixes take under 30 minutes and cost under $30 in parts.
Before you start
Tools and parts to have nearby
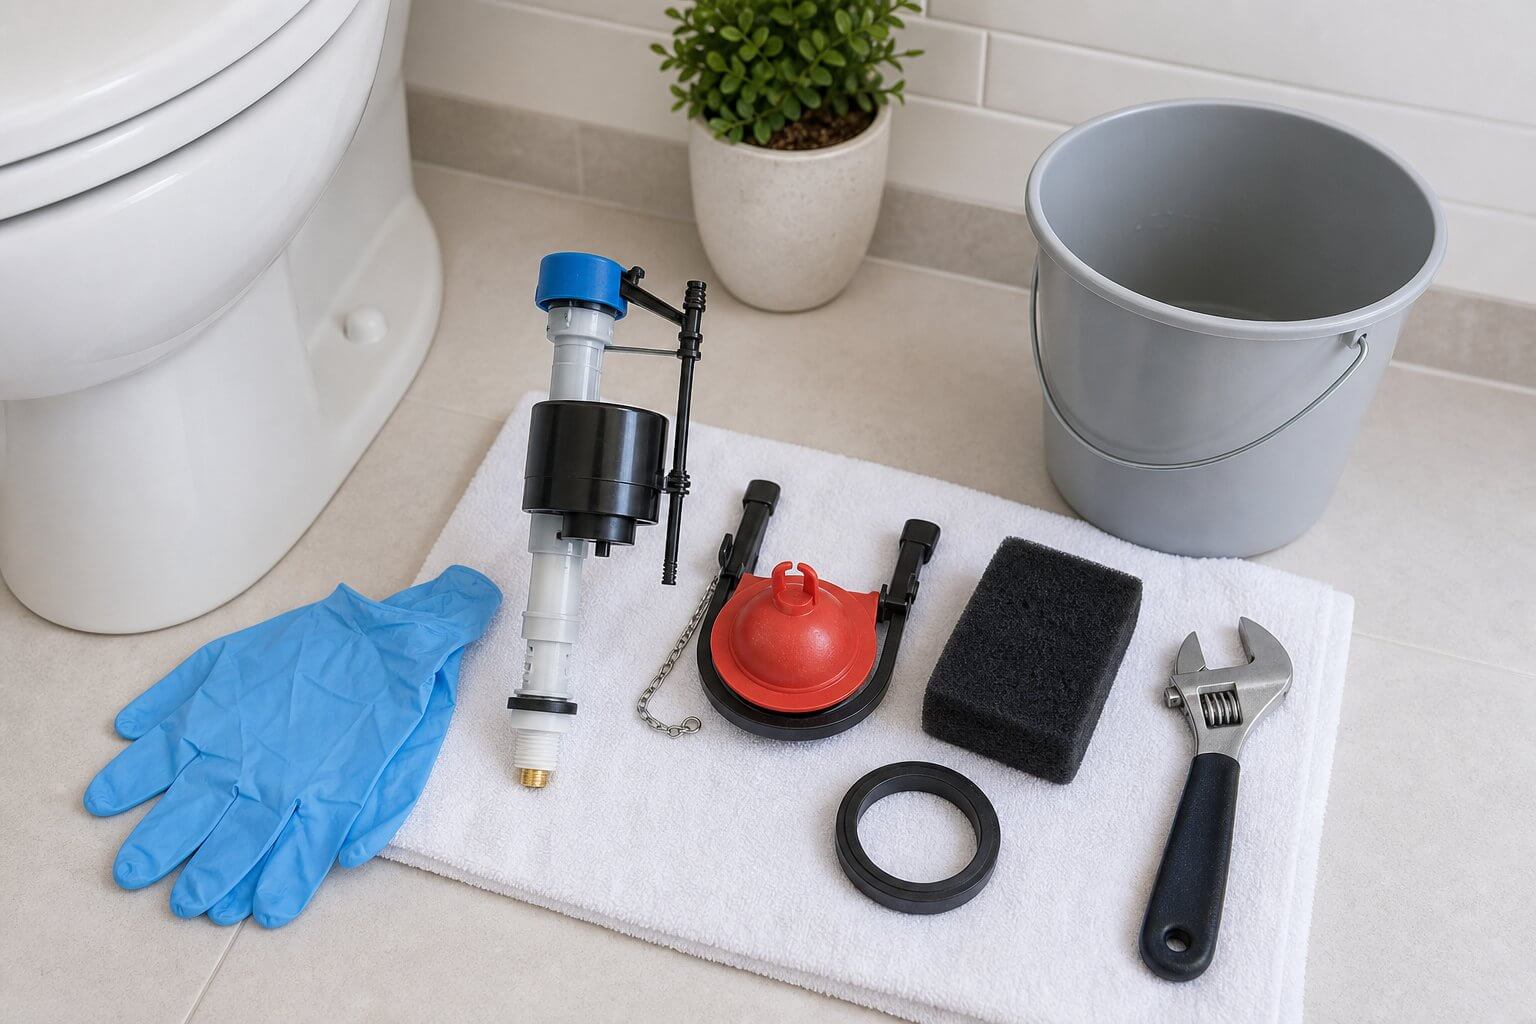
These repairs are much calmer when everything is within reach. You may not need every item, but having them nearby is what keeps a quick job from turning into a half-finished one with parts spread across the floor.
- Replacement flapper (match your toilet brand or bring the old one to the store)
- Replacement fill valve if needed (universal valves fit most toilets)
- Adjustable wrench
- Sponge and small bucket
- Old towel for the floor
- Rubber gloves
- Phone camera for photos before you disassemble anything
A little diagnosis first
What to check before you begin
Diagnose before you buy parts
Lift the lid, flush, and watch the tank fill and settle. Add a few drops of food colouring to the tank water and wait 15 minutes without flushing. If colour appears in the bowl, the flapper is leaking. If the fill valve keeps running after the tank is full, the float is set too high or the valve itself is worn.
Know your toilet brand if you can
Flappers are not all the same. Some toilets use proprietary flappers that do not accept universal replacements. The brand name is often stamped inside the tank lid. If you can find it, you will save a trip back to the hardware store.
Condo and rental rules apply here too
In Toronto condos and rental units, plumbing repairs inside the tank are generally your responsibility. But if there are shutoff valve issues, shared water lines, or any leak that could affect other units, check with your building management before proceeding.
Step-by-step
How to Fix a Running Toilet
1. Shut off the water supply to the toilet
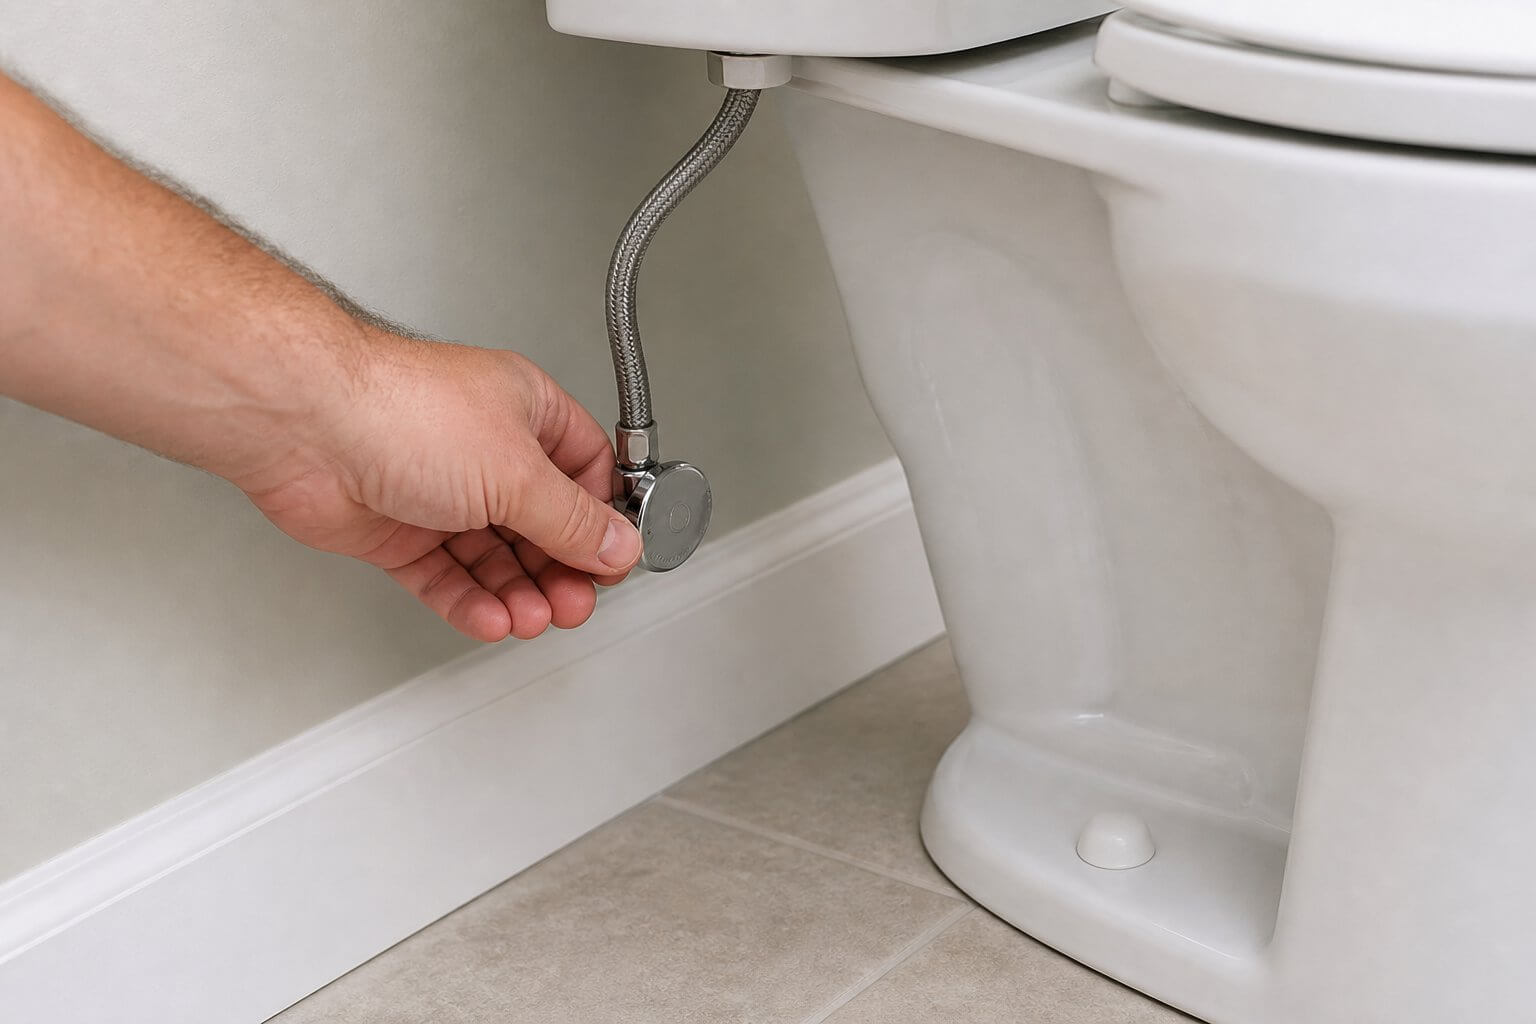
The shutoff valve is on the wall behind or below the toilet. Turn it clockwise until it stops. Flush once to empty the tank, then remove the lid and set it somewhere safe — toilet tank lids are heavier than they look and crack easily.
If the shutoff valve is stiff, corroded, or leaks when you turn it, stop here. A shutoff valve that has not moved in years can break if forced. That is when a quick repair becomes a bigger problem.
2. Diagnose the flapper first
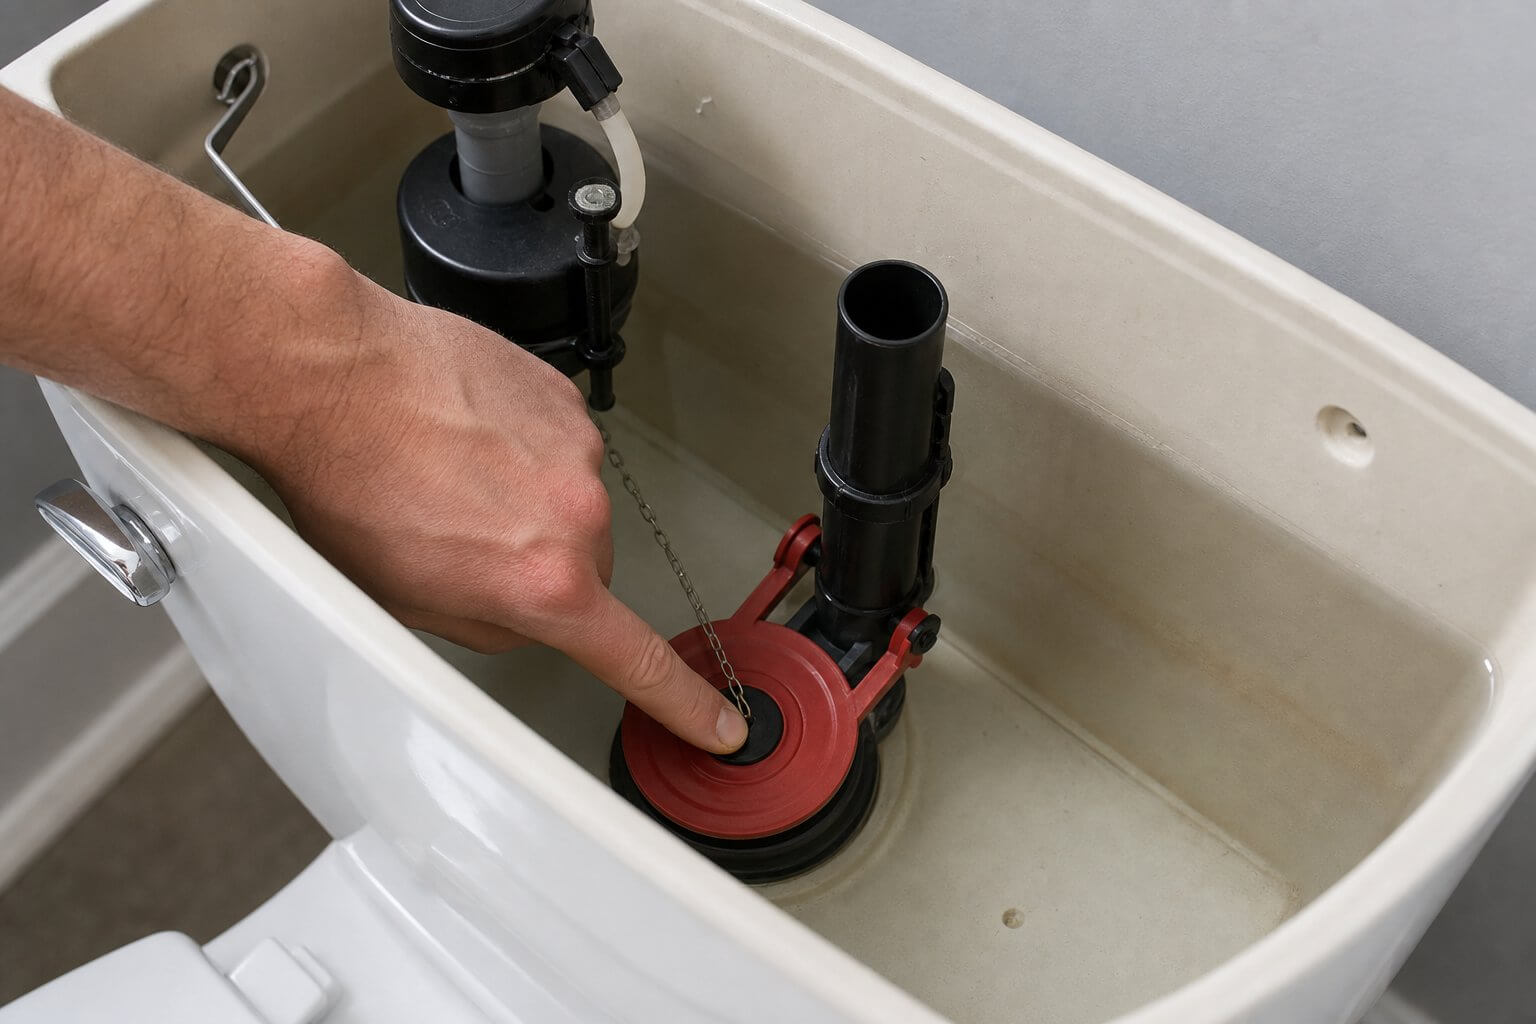
The flapper is the rubber disc at the bottom of the tank that lifts when you flush and drops to seal the tank so it can refill. Press down on the flapper with your finger while the toilet is running. If the sound stops or slows, the flapper is not sealing properly.
Look for warping, cracks, mineral buildup on the seating ring, or a flapper that feels hard and brittle instead of flexible. Any of these mean the flapper needs to be replaced.
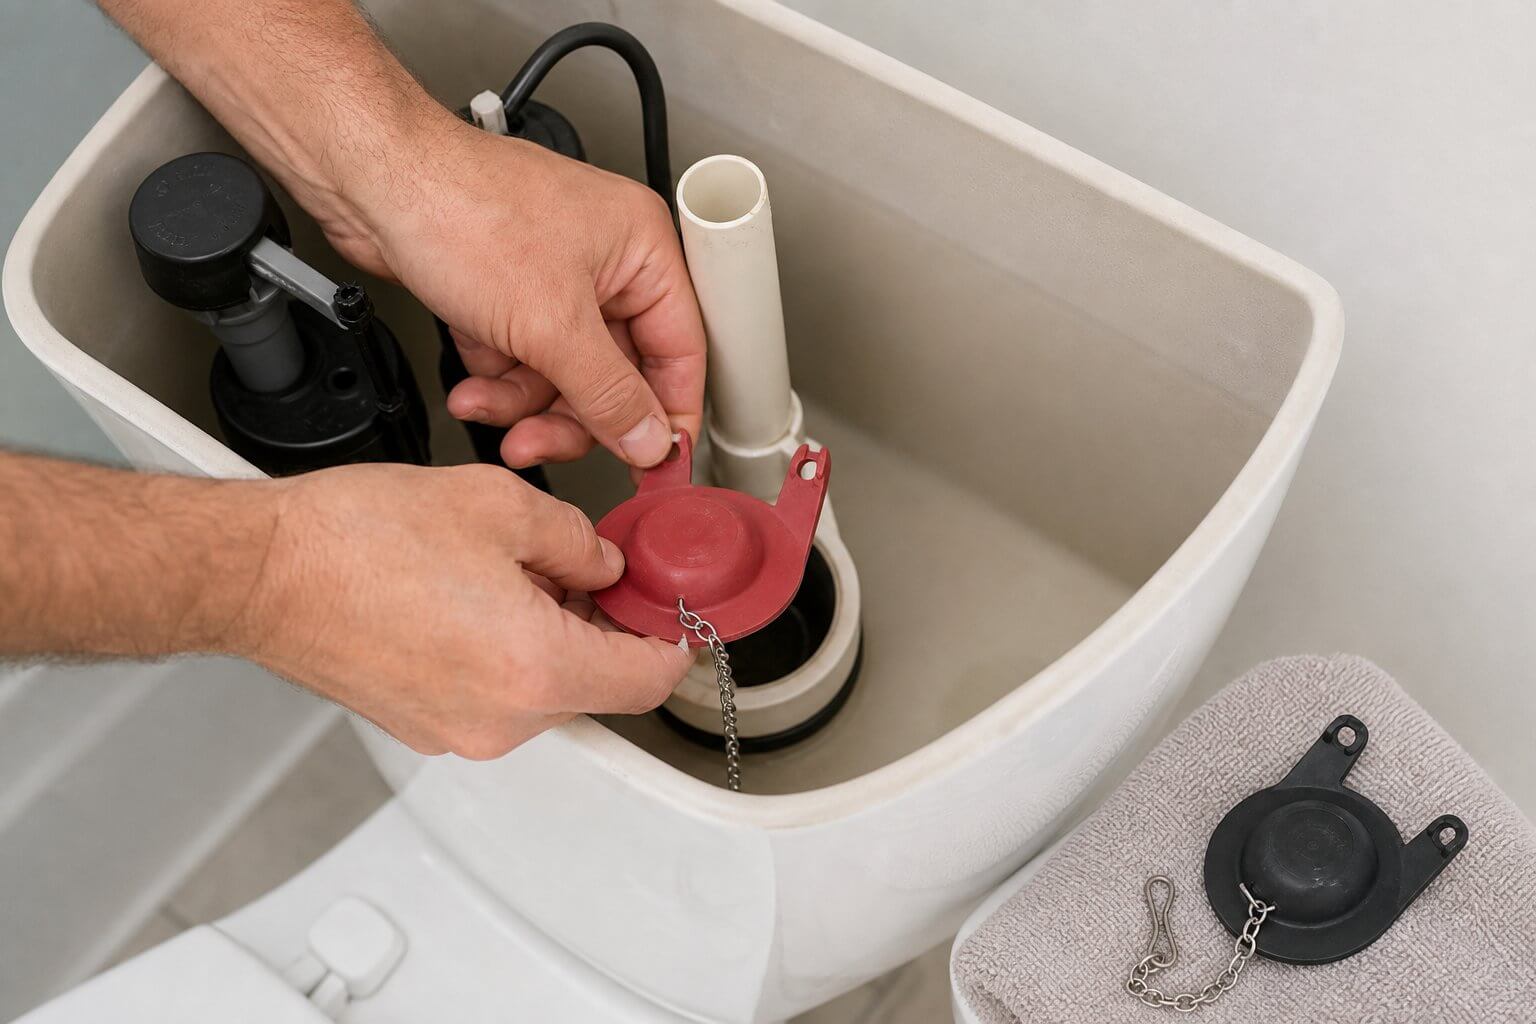
3. Replace the flapper
Unhook the flapper arms from the pegs on the sides of the flush valve, then unhook the lift chain from the flush handle arm. Take the old flapper to the hardware store if you are not sure which size fits — flappers come in 2-inch and 3-inch sizes, and some brands require their own.
Snap the new flapper onto the valve pegs and reconnect the chain. There should be about half an inch of slack in the chain when the flapper is closed — too short and it will not seal, too long and it can get caught under the flapper.
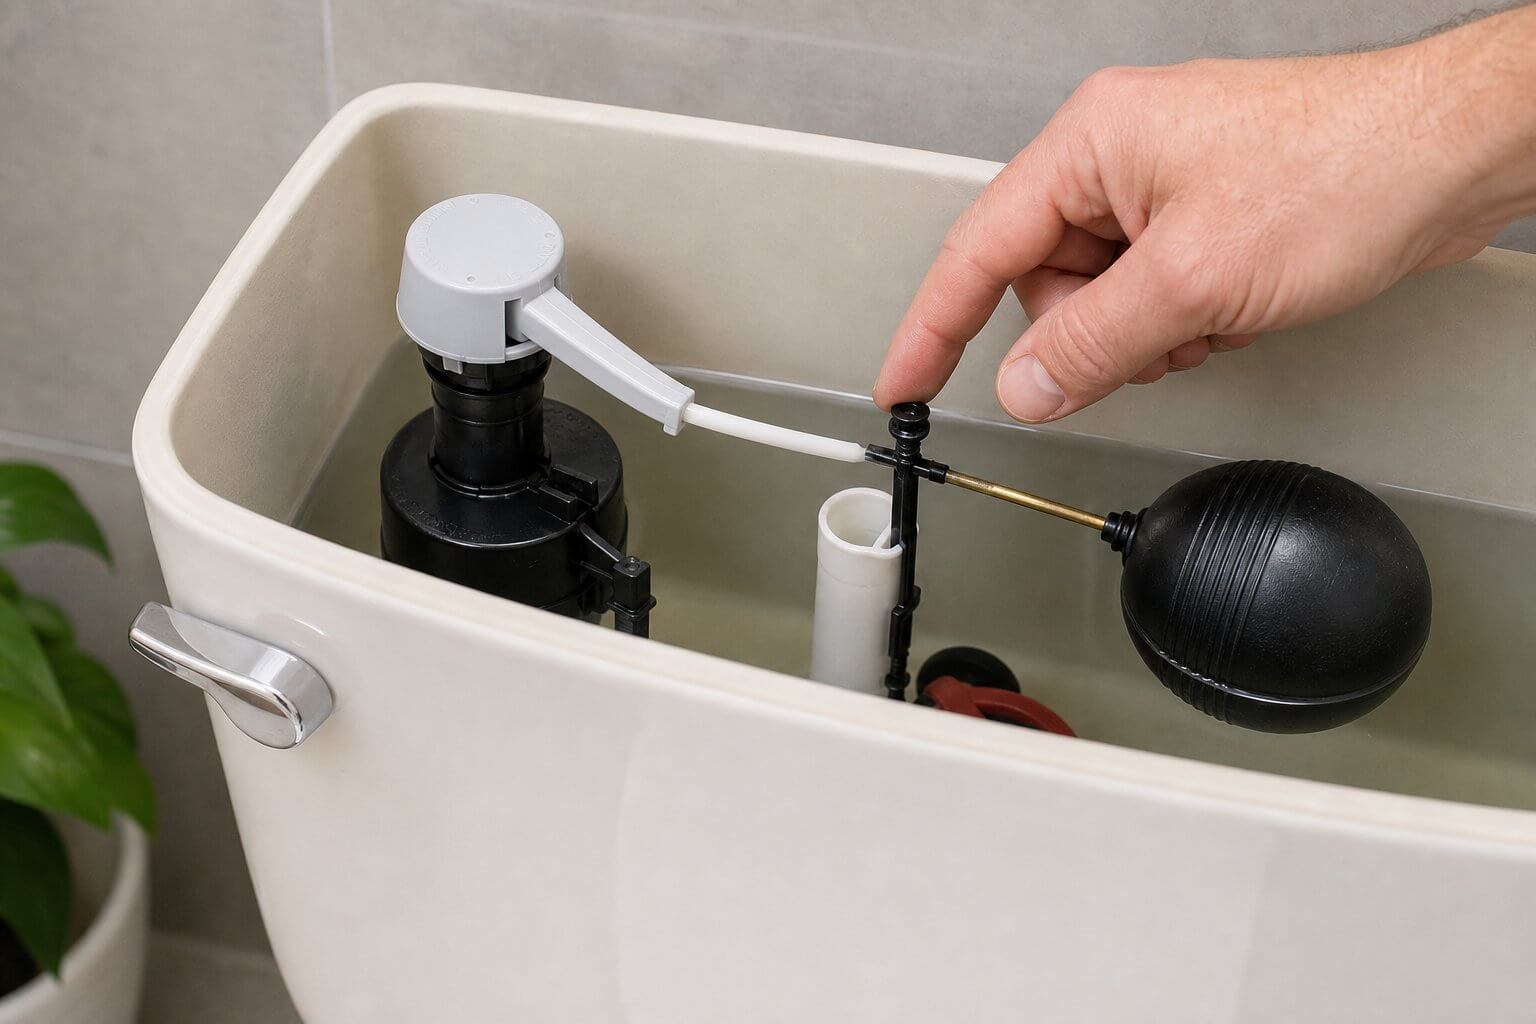
4. Check the fill valve and float
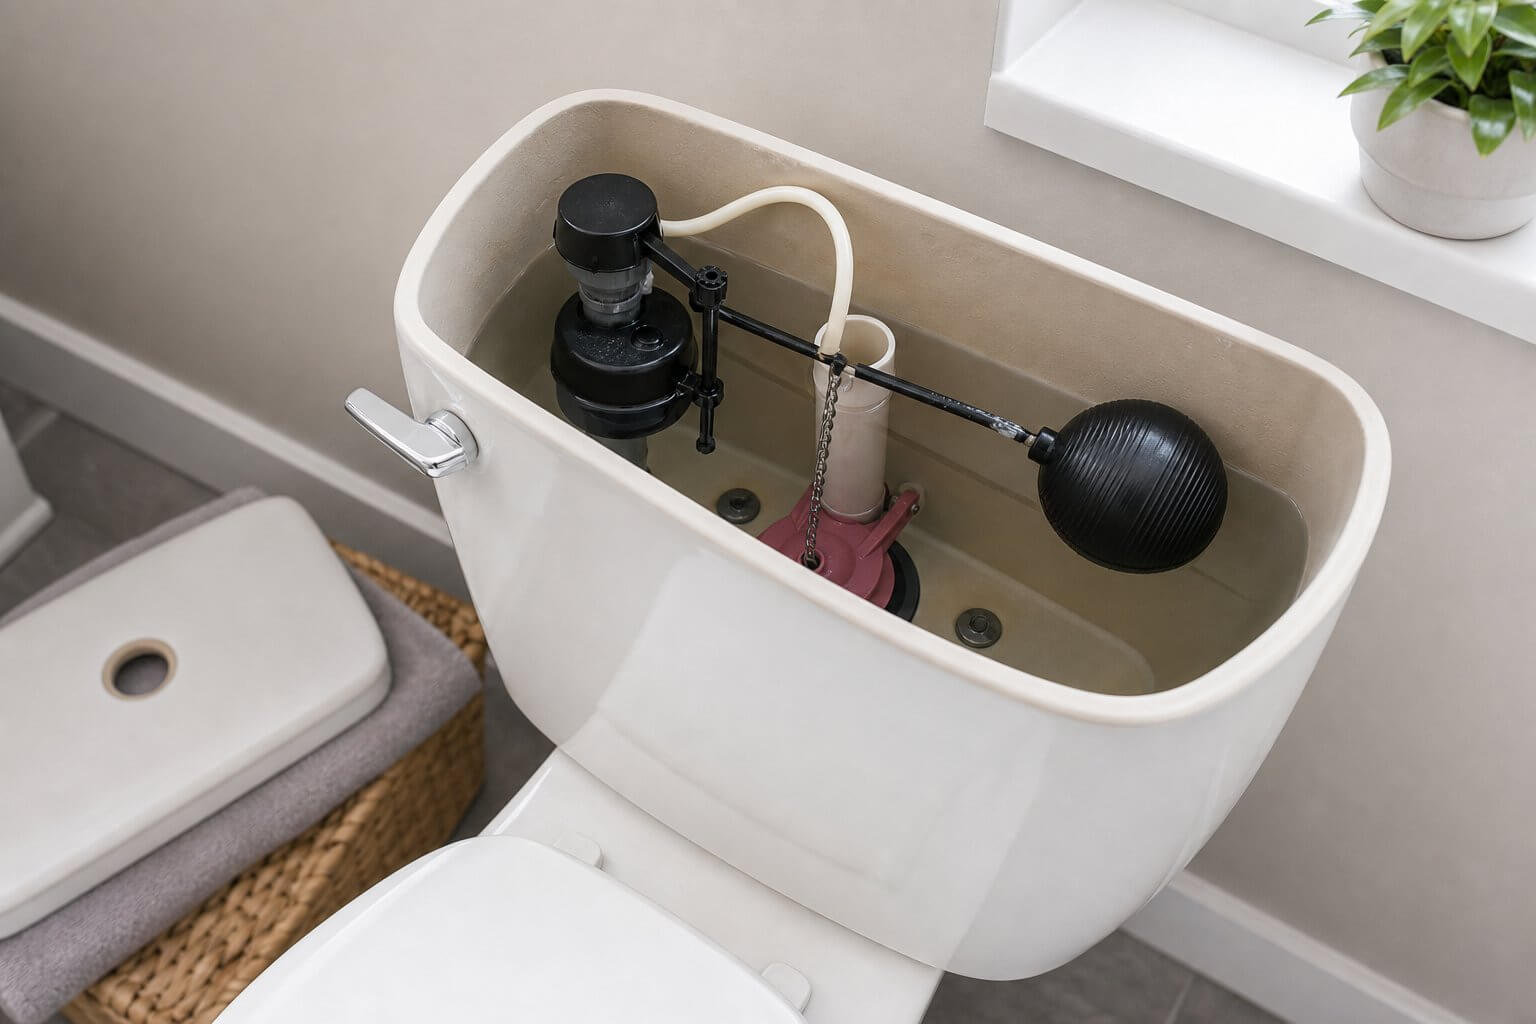
After replacing the flapper, turn the water back on and let the tank fill. The water level should settle about an inch below the top of the overflow tube — the tall tube standing in the centre of the tank. If water is running into or near the top of the overflow tube, the float is set too high.
On modern fill valves, there is usually a float adjustment clip or screw on the valve shaft. Turn it to lower the water level. On older ballcock valves with a floating ball on an arm, gently bend the arm downward or turn the adjustment screw.
5. Replace the fill valve if adjusting does not help
If the fill valve keeps running even with the float adjusted correctly, the valve itself may be worn. Universal fill valves cost around $15 at any hardware store and fit most toilets.
Shut off the water, flush to empty the tank, then use a sponge to remove the remaining water at the bottom. Disconnect the supply line from the bottom of the fill valve, unscrew the locknut holding the valve in place, and lift the old valve out. Install the new valve according to its instructions, reconnect the supply line, and turn the water back on.
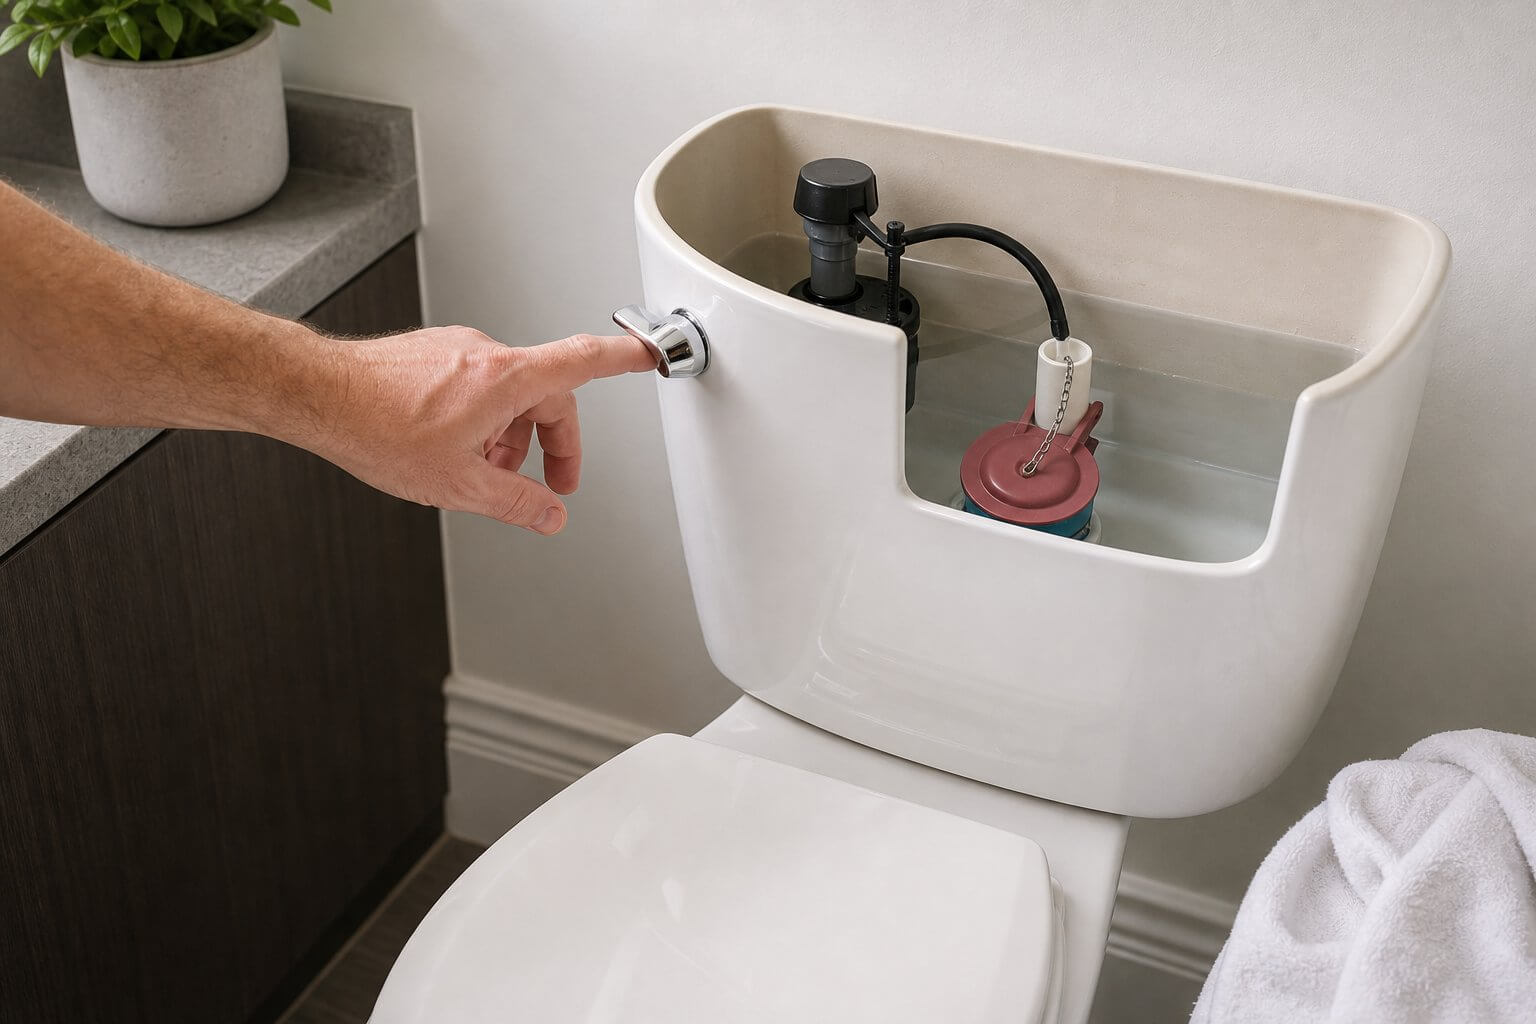
6. Test and confirm the repair
Flush three or four times and watch the tank refill and settle. The fill valve should shut off cleanly, the flapper should seal without water continuing to run into the bowl, and the water level should sit steady below the overflow tube.
Replace the tank lid and listen for any running sound over the next few minutes. A toilet that is silent between flushes is a toilet that is working properly. Check back in an hour just to be sure.
If something still feels off
Troubleshooting common problems
Toilet still runs after replacing the flapper
Check that the chain has the right amount of slack and is not caught under the flapper. Also inspect the flush valve seat — the ring the flapper sits on — for mineral deposits or cracks. A rough or uneven seat will prevent any flapper from sealing properly.
Fill valve keeps running even after adjustment
The fill valve diaphragm or seal inside the valve is likely worn. At that point, replacing the entire fill valve is easier and cheaper than trying to find and replace internal parts.
Water appears on the floor around the base of the toilet
Stop here. Water at the base during or after flushing usually means the wax ring seal has failed. This is a more involved repair that requires removing the toilet. It is worth getting help rather than continuing.
The toilet runs intermittently — ghost flushing
Ghost flushing is almost always a slow flapper leak. The tank slowly empties through the bad seal until the fill valve triggers to refill it. The food colouring test will confirm it. Replace the flapper.
Know when to stop
When it is better to call for help
There is no prize for turning a small repair into a much larger one. If one of these situations shows up, bringing in help is the practical move:
- The shutoff valve behind the toilet is stiff, leaking, or will not close fully.
- Water is appearing on the floor around the base of the toilet during or after flushing.
- The flush valve seat is visibly cracked or damaged and needs replacing.
- The toilet needs to be removed to access or fix the problem.
- You live in a condo or rental where any plumbing work needs building approval.
- The repair has already been attempted and the toilet is still running.
FixitTask
Not the right repair for a Tuesday night?
If the shutoff valve is stuck, water is on the floor, or the diagnosis is unclear, it is worth bringing in help before a small fix becomes a bigger problem. FixitTask lets you compare local handyman providers in Toronto, ask questions before booking, and choose someone who has done this kind of repair before.
FAQ
Questions people usually ask
Why does my toilet keep running after I flush?
The most common cause is a worn flapper that no longer seals properly against the flush valve seat. Water slowly leaks through into the bowl, and the fill valve runs continuously to compensate. The second most common cause is a float set too high, which sends water into the overflow tube instead of stopping the fill valve.
How much does it cost to fix a running toilet yourself?
A replacement flapper costs $5 to $15. A universal fill valve costs $12 to $20. Most running toilets can be fixed for under $25 in parts. If you need a plumber or handyman, expect to pay for one hour of labour at a minimum.
How do I know if my flapper or fill valve needs replacing?
Drop food colouring in the tank and wait 15 minutes without flushing. If colour appears in the bowl, the flapper is leaking. If the fill valve keeps running after the tank is full and the food colouring test shows no leak, the float is set too high or the fill valve is worn.
How much water does a running toilet waste?
A slow flapper leak can waste 25 to 100 litres per day. A fast or continuous leak can exceed 200 litres per day. Over a month, that adds up quickly on the water bill and is worth fixing promptly.
Is a running toilet an emergency?
Usually not immediately, unless water is on the floor. A running tank is wasteful and noisy but not dangerous in most cases. If water is appearing at the base of the toilet, that is more urgent — a failed wax ring can cause water damage to the floor and subfloor if left.